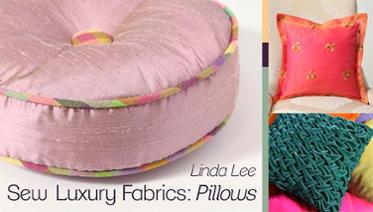
It's Easy to Learn How To Sew A Pillow!
Learning how to sew a pillow is a great first step to sewing more complex items, such as toys, bags, purses and clothing.
Sewing pillows teaches basic sewing techniques and builds confidence in a person’s sewing skills. Not to mention you have just completed a one of a kind piece to decorate your home!
Choosing the type of fabric is the first step in learning how to sew a pillow. Fleece is a nice choice if you want warmth and softness. Cotton remains cool and has a smooth feel, while twill, corduroy and denim are heavy but durable.
Pillows that will be used often should be constructed of heavier, stain-resistant fabrics while bed and decorative pillows can be made from more delicate fabrics.
Stuffing
Polyfill stuffing is a synthetic material that can be washed and will not bunch up after cleaning. Pillow forms are available at fabric and craft stores and many are made from pre-cut foam.
Foam pillow forms come in a variety of shapes and sizes, and produce a finished product that is more uniform. That being said, cushion forms can be made by scratch in any size or shape you might wish for.
Foam pillows can be washed but should be air dried to allow the foam to retain its shape.
Getting Started
Sharp scissors are important when learning how to sew a pillow because the edges of the fabric should have clean cut edges. In fact, many who sew never use their sewing scissors for any other cutting task because cutting anything other than fabric dulls the edges.

Cutting for Shaped Foam Pillows
Lay the foam onto a piece of paper newspaper works but it can leave residual ink on some fabrics especially light colored fabrics.
Place a ruler or a yardstick next to the foam and measure out from the edge two inches for foam shapes that are less than three inches wide at the outer edge and add one additional inch for each additional inch of foam. Repeat this step on the three remaining sides.
Cylinders or circles are drawn by hand using the same formula. Cylinders can be placed on the edge of the paper, rolled along the paper stopping when the shape has reached the starting point. Cylinder patterns require one additional inch be added to the long side and two circular pattern pieces that are also one inch wider than the actual measurement.
Cutting for Polyfill Pillows
Determine the shape of your pillow. A ten-inch round pillow pattern will measure eleven inches with the one additional inch. Square and rectangular pillow patterns also require one additional inch as well.
Cutting Fabric
Lay the pattern pieces on the fabric pin in place or use fabric weights to hold the pattern in place. Square, rectangular and round pillows require two identical pieces and cylindrical three.
Cut along the pattern piece edge being careful not to cut into the paper.
How To Sew A Pillow Together
Sewing the pillow can be done by hand or using a sewing machine and seams should be ¾ of an inch from the edge of the fabric. If sewing by hand you will need to make two seams on all sides to create a professional finish.
Foam shaped pillows will need one entire side left open to insert the shape; polyfill pillows can be stuffed with one quarter of the last seam open and cylindrical pillows are stuffed leaving one end open.
Once the pillow is stuffed, sew the opening closed using a hand needle that will allow you to hide the stitches.
Once you know how to sew a pillow, you may want to redecorate every room in the house. Using the construction methods for pillows, dog and cat beds, crib bumpers and other useful items can be sewn.
Return to the Simple Sewing Projects Page
Go to Creative Sewing Tips Home Page
